I’ve Moved!
Hello! I have merged my food blog with my author’s website. And if you’ve wound up here, it’s because the redirect expired. You can hop on over to the new site here! And if you like, leave me a comment here letting me know how you wound up here.
Ground Lamb Stew

- 1 lb ground lamb
- 8 slices thick slices bacon
- 6 cups beef stock
- 5 carrots, peeled and diced* (note, depending on the size of stuff, you should have about the same amount of diced carrots as parsnips when you’re through)
- 2 parsnips, peeled and diced
- 1 12 oz. bag frozen pearl onions
- 6 average russet potatoes, diced (not the ginormous bakers, just an averaged size potato)
- 4 ounces fresh mushrooms, sliced
- 1 tbs minced garlic
- 1 tsp dried thyme
- 1 tsp ground pepper
- 1 tbs kosher salt
Directions:
- Preheat your oven to 300 degrees.
- Brown the lamb, breaking up with a wooden spoon as it cooks. You want things to get a bit caramelized. Caramelized means FLAVOR!
- Cut the bacon into chunks and cook in a large dutch oven until crispy and remove with a slotted spoon.
- Pour the bacon grease into a bowl. Add 2 tablespoons back to your dutch oven..
- Add the carrots and parsnips and saute until just starting to caramelize.
- Add the garlic and saute for about 30 seconds.
- Deglaze the pan with 1 cup of the stock, scraping up all those lovely brown bits.
- Add the lamb back to the pan.
- Add the rest of the stock, potatoes, carrots, parsnips and thyme. Bring the mixture back to a boil.
- Cover and simmer for 40 minutes.
- Add another tablespoon of bacon grease to a skillet and heat over medium heat.
- Add the pearl onions and mushrooms and saute until softened.
- Add the reserved bacon, onions, and mushrooms, along with the pepper and salt to the dutch oven and cook for another 20 minutes.
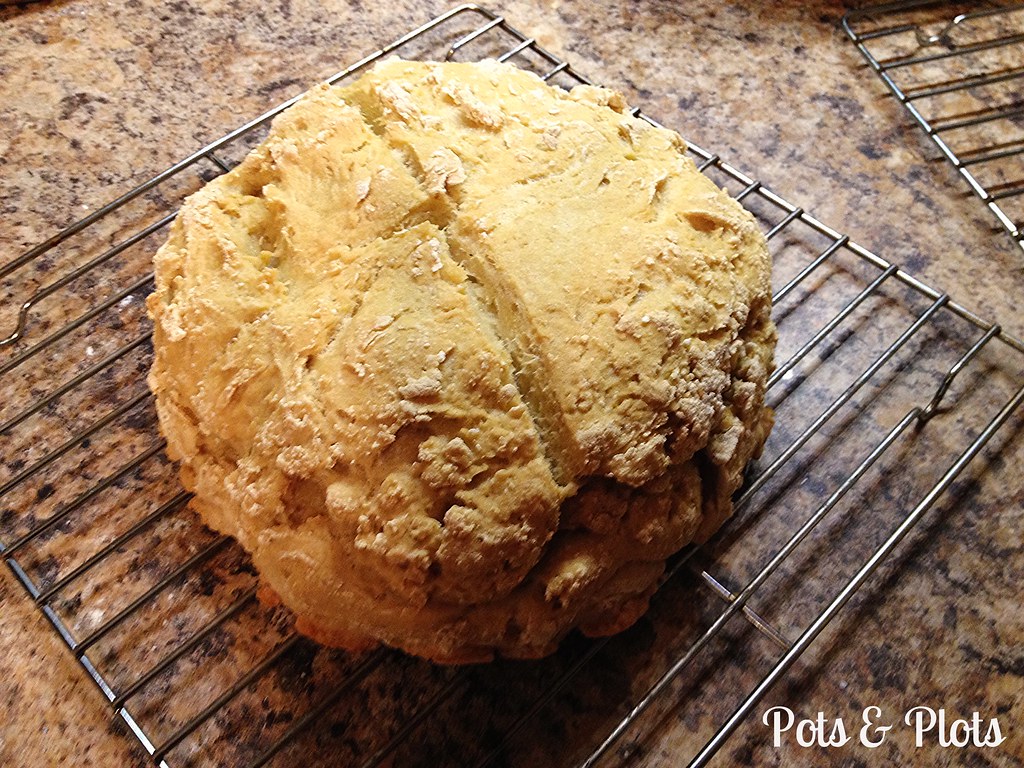
Gluten Free Dairy Free Irish Soda Bread
- 2 cups non-dairy milk (I used unsweetened almond milk) soured with 1 tsp lemon juice and 1 tsp apple cider vinegar (you can use 2 tsps of either of them, I just find the blend to give the best buttermilk flavor for non-dairy purposes)
- 4 cups Jeanne’s Gluten Free all purpose Mix
- 1 tsp baking soda
- 1 tsp salt
- 1 tsp xanthan gum
- Preheat oven to 450 degrees.
- Add the vinegar and lemon juice to the milk and give it a stir before setting it aside to sour.
- Sift the flour, baking soda, salt, and xanthan gum together.
- Add the soured milk, working quickly to stir together a soft dough.
- Form it into a ball about the thickness of your fist and place into a greased dutch oven (I use my Le Creuset enameled cast iron).
- Cut a shallow x across the top.
- Cover and bake near the top of the oven for 30-45 minutes.
- When properly baked, the loaf should sound hollow when thumped from the bottom.
Gluten Free Dairy Free Bacon Corn Chowder

Ingredients:
- 8 slices thick cut bacon, diced
- 1 can creamed corn
- 1 12 oz bag of frozen corn
- 1 medium onion, diced
- 1 cup chicken stock
- 1 tsp sea salt
- 1/2 tsp black pepper
- 1/2 tsp paprika
- 1/2 tsp garlic powder
- 4 ounces Tofutti Better Than Cream Cheese or other dairy free cream cheese substitute
- In a heavy dutch oven (I used my Le Crueset), cook the bacon over medium low heat until crispy.
- Remove to paper towels to drain with a slotted spoon.
- Pour off all but about a tablespoon of the remaining bacon grease. Be sure to leave all the browned bits at the bottom! That is flavor, my friend!
- Add the onion and cook until translucent, about 5 minutes.
- Add the frozen corn, stir, and cook for approximately 5 minutes, or until the kernels start to get a little caramelized.
- Slowly add the chicken stock, stirring with a wooden spoon to get up those browned bits at the bottom.
- Add the can of creamed corn and spices and stir well.
- Reduce heat to simmer and cover, cooking for 15 minutes.
- Remove the top and add in the faux cream cheese, stirring constantly until it’s melted into the soup.
- Add the bacon and simmer for 5 more minutes.
- Serve with a good crusty bread. Or you can be like me and make a grilled cheese. This was my experiment with Go Veggie’s Vegan Cheddar slices. Which make a passably good grilled cheese, though it seems that once the stuff melts, the bread really absorbs it.
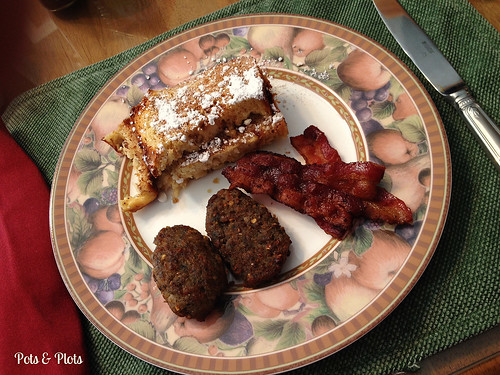
Gluten Free Dairy Free French Toast Bake
This batch of decadence was my hubby’s request for Christmas morning breakfast. It was a recipe somebody shared on Facebook (and I’m sorry, I have no idea WHOSE the original recipe was!) that he asked me to convert to something we could both eat. Not a small order with the whole gluten AND dairy free restrictions. But I took it on and the results were, frankly, nothing short of spectacular. The whole family LOVED this. I don’t actually like normal French toast, but I really enjoyed this. We had it with some fresh sausage from the butcher shop and bacon (because that’s how we roll). This recipe is for a half batch (9×9 pan). If you’re feeding a crowd, double everything and use a 9×13.
1/2 cup brown sugar
1/2 loaf of thickly sliced gluten free dairy free bread
2 eggs
3/4 cup unsweetened almond milk (or other neutral dairy free milk)
1/2 teaspoon vanilla
Powdered sugar for sprinkling
Cinnamon for sprinkling
2. Pour butter/sugar mix into bottom of 9×9 pan….spread around.
3. Beat eggs, milk, & vanilla
4. Lay single slices of bread in pan
5. Spoon 1/2 of egg mixture on bread layer
6. Sprinkle some cinnamon over bread/eggs
7. Add 2nd layer of sliced bread
8. Spoon on remaining egg mixture
9. Cover & chill in fridge overnight
10. Bake at 350 for 45 minutes (covered for the first 30 minutes)
11. Sprinkle with powdered sugar & cinnamon
12. Serve with warm maple syrup
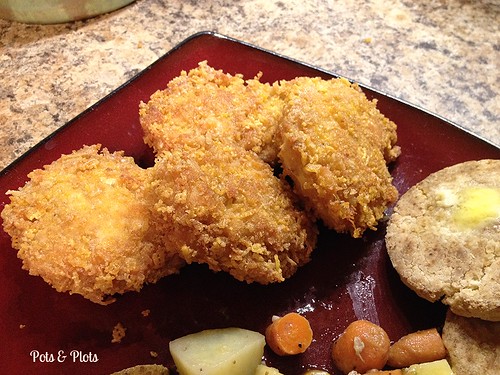
Gluten Free Chicken Croquettes
Ingredients:
- 1 12 oz. can of shredded chicken, drained
- 3 eggs
- 1 tbsp dijon mustard
- juice of 1 lemon
- pinch of salt
- 2 tbsp fresh scallions (just the green parts) minced
- 1/2 cup + more for breading GF panko breadcrumbs (The cheat easy version I use for this is to blitz a box of Corn Chex and a box of Rice Chex in the blender…it’s a great, crunchy breading and cheaper than the specialized GF breadcrumbs)
- neutral oil to fry in (I use sunflower)
- Drain and fluff your chicken (just break up the chunks as they come out of the can).
- Add your eggs, mustard, lemon juice, salt, scallions, and the 1/2 cup of breadcrumbs. Stir well to combine.
- Set up a tray or plate with a sheet of parchment paper.
- Scoop up the mixture and form into patties (approximately 2 inches across) and set aside on the parchment paper to hang out for about fifteen minutes. The excess moisture will drain off and/or be absorbed by the breadcrumbs mixed in, creating COHESION.
- Add more breadcrumbs to a pie plate.
- One at a time, coat the croquettes in breadcrumbs. This makes about 8 croquettes.
- Preheat your oil to medium heat. You don’t need a lot, just enough to cover the bottom of your skillet.
- Cook croquettes approximately 4-5 minutes a side, or until golden brown.
- Drain on paper towels before serving.
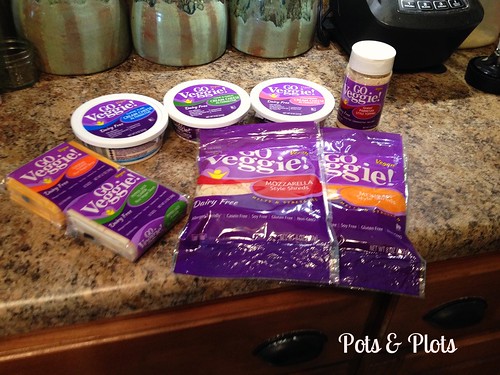
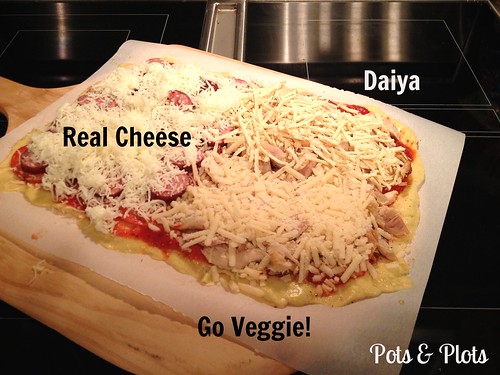
Product Comparison: Daiya Mozzarella Shreds vs. Go Veggie! Vegan Mozzarella Shreds
I recently received a box of Go Veggie!’s entire vegan line of alterna-cheese products to test out (thank you Go Veggie!). This is a brand my local grocery carries, but they only have the Lactose free line (it has been my experience that unlike gluten intolerance, the average person has never heard of casein intolerance and they assume that a dairy allergy is lactose intolerance–not the same thing, peeps), so I was eager to give these a try, as I feel like if Kroger carries one, they might be willing to start carrying the other. Over the next few weeks, I’ll be trying all of them, but for now, we’re starting with the mozzarella shreds.
We had pizza for dinner tonight, which gives a great opportunity for a head to head comparison of my usual Daiya mozzarella shreds vs. these Go Veggie shreds vs. the real cheese at my hubby’s end of the pizza. Here you can see what all three look like before going into the oven. Straight out of the bag, you can see that the Go Veggie! looks a bit more like thick shredded mozzarella than the Daiya.
Now, let’s look at this OUT of the oven. Right off the bat I was SHOCKED that the Go Veggie! shreds MELTED LIKE REAL CHEESE. I mean, look at that! It CONFORMED TO THE PIZZA TOPPINGS (chicken and bacon, in case you were wondering). It even oozed off the side. In fact, it melted a little bit more than regular cheese, but I can deal with that. The Daiya, by contrast, still looks much as it did when it went in the oven. Now one of the weird things about Daiya is that when it heats, the inside liquefies, so as soon as the surface tension of the outside of the cheese is broken, you get this glorious, creamy texture. So when you EAT Daiya on pizza, it’s all melty in your mouth. Just not for your eyes.
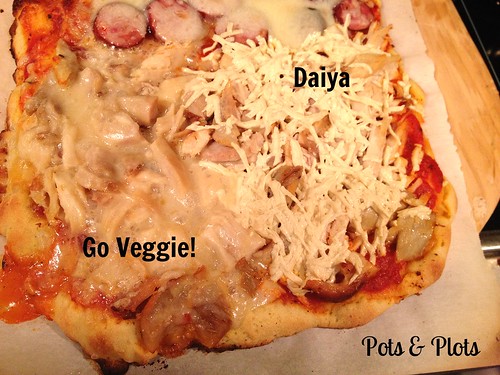
Now, finally, let’s talk about taste. I really enjoyed both of these mozzarella shreds. Taste wise, I don’t think they were too terribly different. If blindfolded, I don’t know if I’d know which was which by taste alone–at least not in this dish where there are a lot of other flavors competing. So, since at least part of eating is a visual experience, for pizza, I’m actually going to call the Go Veggie! Mozzarella shreds the winner. I could have a pizza with this and looking at it never know I wasn’t eating real cheese. Anything that makes me feel like less of a freak with this dairy allergy is a real winner for me.
Pulled Pork Tortilla Soup
I recently got a smoked Boston butt for a youth group fundraiser (and how great an idea is that? Allergen friendly, not crap processed food, and OMG it’s fabulous) that netted me a gallon and quart freezer bags full of pulled pork. I can only eat so many barbeque sandwiches, so once the weather started cooling down, I decided to see if I could adapt it to a soup. Because we love all things Mexi-flavored in this house, the most obvious thing to convert was my chicken tortilla soup. The end result was spicy and delicious and perfect. Servings: 6 at 337 calories and 17 grams of fat (before toppings)

Ingredients:
- 3 cups pulled pork
- 4 ounces diced green chilies
- 15 oz can of diced tomatoes
- 1/4 cup bell pepper, chopped
- 1/2 cup roasted red peppers, chopped
- 1 medium onion chopped
- 32 ounces chicken stock
- 8 ounces Mexican tomato sauce (if you don’t like heat, just use regular tomato sauce)
- 2 cups black beans, rinsed
- 2 cloves garlic, minced
- 1/2 tbs chili powder
- 1 tbs cumin
- 1 cup water
- 2 tsp sea salt
Directions:
1. This is one of those fabulous fix it and forget it recipes. It’s literally dump all the ingredients in the crock pot and cook on low for 6 hours.
2. Serve with sour cream, cheese, avocado, tortilla chips–whatever floats your boat.
Gluten Free Dairy Free Corn Dog Bites
It’s football Armageddon here in Mississippi today. The Bulldogs are taking on the Aggies and the Rebels are going head to head with Alabama. All four are undefeated. It’s TENSE. This means marathon game watching all day and requires appropriate game time sustenance. This is a bit harder now that cheese dip has been taken off the menu (because, dude, nothing says football like chips and rotel). But I didn’t give up! I had half a pack of uncured beef hot dogs from Kroger’s Simple Truth line, so I decided to whip out my mini muffin pan and try my hand at corn dog bites. Since they disappeared in about five minutes, I’m gonna call this a win. Makes 24 corn dog bites. #HailState #HottyToddy

Ingredients:
- 1/4 cup melted Earth Balance
- 1/4 cup sugar
- 1 egg
- 1/2 cup almond milk (soured with 1/2 tsp apple cider vinegar)
- 1/4 tsp baking soda
- 1/2 cup cornmeal
- 1/2 cup all-purpose gluten free flour
- 1/4 tsp salt
- 4 hot dogs cut into 6 pieces each
Directions:
- Spray mini muffin tins with non-stick cooking spray.
- In a glass measuring cup, measure almond milk and add the vinegar and let sit a bit.
- In a large mixing bowl, melt Earth Balance in microwave. Add sugar and use a spatula or wooden spoon, to mix into Earth Balance. Add eggs.
- Then add baking soda, mix together.
- Add almond milk/baking soda to the Earth Balance/sugar/egg mixture and mix just until combined.
- In a separate bowl, whisk together cornmeal, flour, and salt. Add to wet ingredients and stir until well mixed.
- Fill muffin tin cups with 1 Tbsp of batter per cup.
- Press a bite sized piece of hot dog into each muffin cup.
- Bake at 375º for 15 minutes or until a toothpick inserted in center comes out with crumbs only and muffin top doesn’t sink in if pressed with fingertip.
- Cool in pan for 2-3 minutes. Remove muffins from pan to cool on a cooling rack until ready to serve. So, you know, 2 minutes to keep from burning your mouth.
Gluten Free, Dairy Free Sausage Balls
It’s officially football season. No Southern party or gathering is complete without sausage balls. The original kind that pop up in every Southern household in the country involves Bisquick and good cheddar cheese, which makes them a no go for those of us with food allergies. I had already successfully made these gluten free in the past with an easy substitution of gluten free baking mix (Pamela’s is best–step away from the brand name Gluten Free Bisquick–that stuff is nasty), so for yesterday’s opening season party, I determined to try to make them dairy free and see how our guests responded (Beware–if you come to eat in MY kitchen, you’re liable to be a guinea pig!). I made the simple substitution of Daiya cheddar shreds and the end results were MARVELOUS. While they were hot, the interiors were actually really creamy with the Daiya (which normal sausage balls aren’t). The whole batch disappeared between the 4 of us in rapid order. Everybody declared them a win. #PartyFoodAchievementUnlocked

Ingredients:
- 1 pound turkey breakfast sausage, room temp
- 1 8 oz. package Daiya cheddar shreds
- 2 cups Pamela’s gluten free baking mix
- 1/2 tsp cayenne pepper (omit if you can actually find spicy turkey breakfast sausage)
Directions:
- Preheat your oven to 350 degrees.
- In a large stand mixer with paddle attachment, dump in the sausage and cayenne pepper. Mix until well blended.
- Add in the Daiya shreds and mix until combined.
- One cup at a time, add in the Pamela’s baking mix and stir until well combined.
- On prepared baking sheet with parchment paper or a silicone mat, roll mixture into balls (about 1 to 1.5 inches diameter). I got maybe 30 out of this batch.
- Bake for 15 minutes.


